REMEMBER. Always wear a mask when cutting pressure-treated lumber.
Cutting list:-
Main portionCutting order:-
A - 4 Posts 1 1/2 " x 1 1/2 " x 84 "
B - 4 Lower rails 1 1/2 " x 1 1/2 " x 11 1/2 "
C - 4 Upper rails 1 1/2 " x 1 1/2 " x 6 "
Top
D - 2 - 1 1/2 " x 1 1/2 " x 5 3/4 "
E - 2 - 1 1/2 " x 1 1/2 " x 3 "
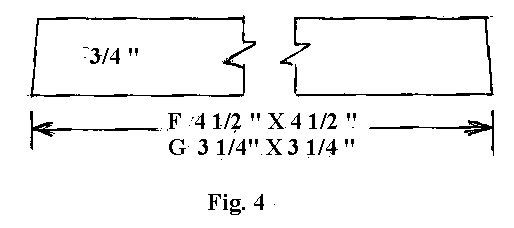
F - 1 - 3/4 " x 4 1/2 " x 4 1/2 "
G - 1 - 3/4 " x 3 1/4 " x 3 1/4 "
H - 1 Finial (pre-made from lumber store)
2 1/2 " Galvanized nails
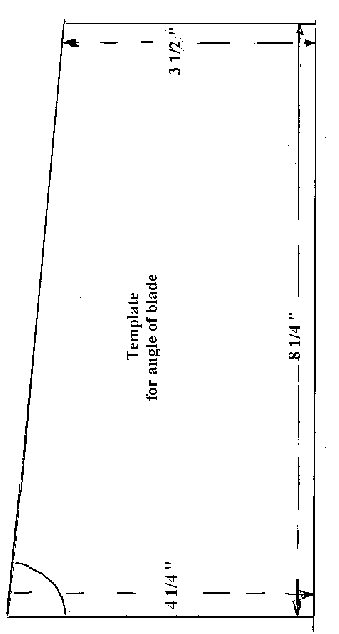
Template for all angled cuts.
1. Cut 2 pieces (D) to length ( square cuts )
2. Set angle of table saw blade. ( Fig 1 )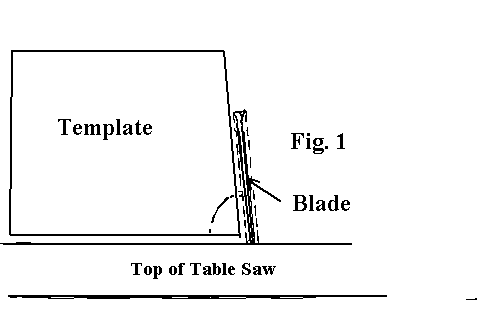
Transfer the supplied template to a piece of card and cut it out.
Hold template against blade and table top and adjust blade.
This will be the angle for all other cuts.
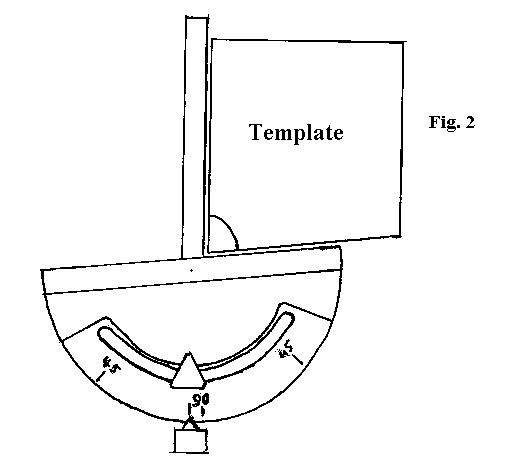
3. Set up your miter gauge to the same angle ( Fig 2 )
Cut 4 posts (A) to length. This cuts an angle from corner to corner and represents the splay of the posts.
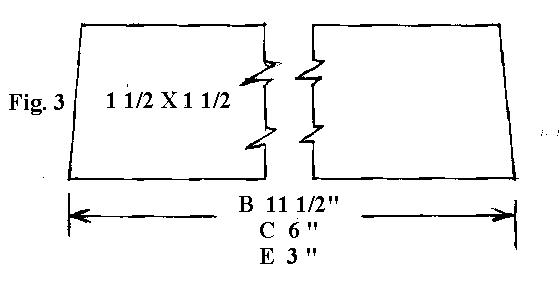
4. Reset miter gauge to 90 degrees.5. Cut 10 pieces (B,C,E) to length. Fig. 3
 6. Cut 2 pieces ( F and G ) with blade still at an angle. Fig. 4.
7. Set rip fence to shape 4 pieces ( D and E ). Fig. 5 . 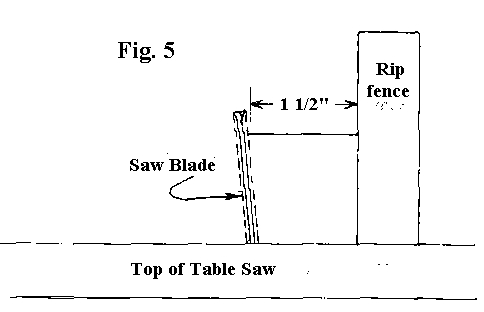
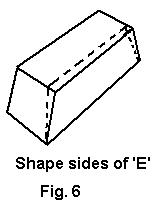
Note :- The long side of ( E ) should be on the table surface. Fig. 6.
7. The last cuts are made with the blade back in the normal 90 degree position
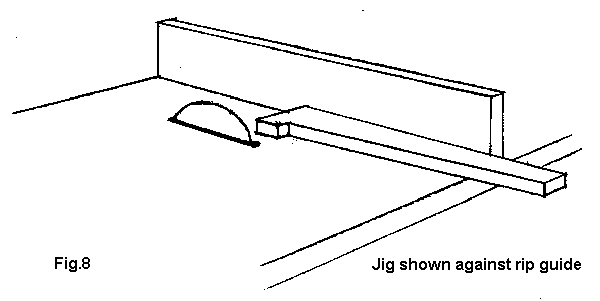
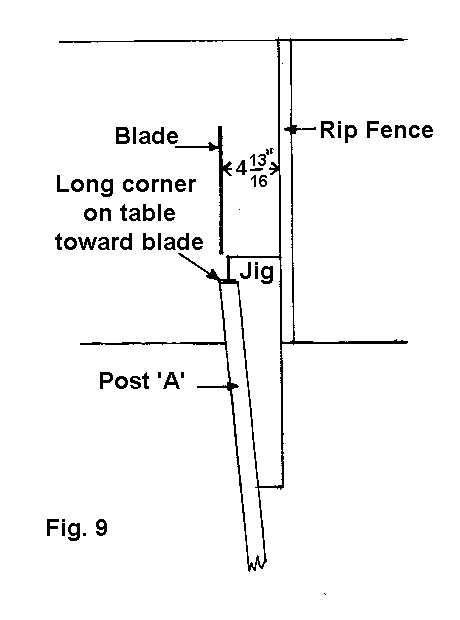
8. Make a jig as described in Fig. 7.9. With rip fence on the right of the blade Fig. 8 and Fig. 9 cut slope on 4 posts (A).
10. Move fence to the left of the blade and repeat for the last slopes on 4 posts (A).
Plans
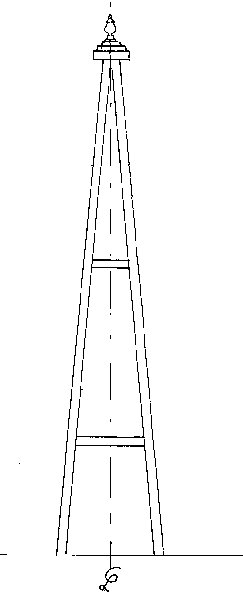
Fig. 10
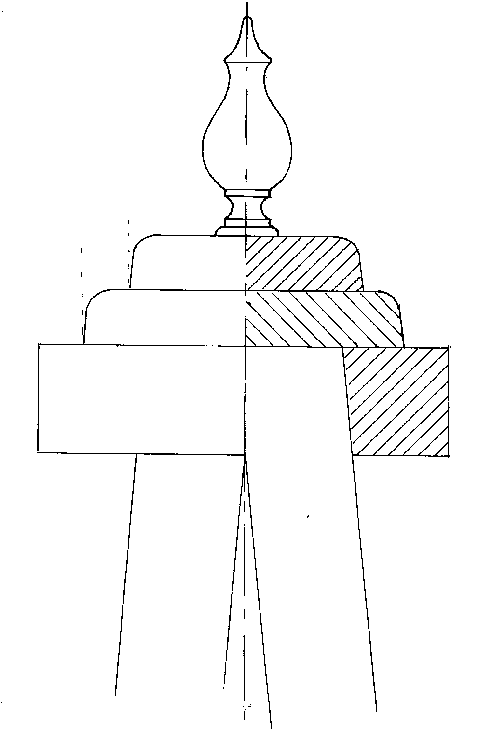
Note: - It is a good practice to pre-drill for nails with a bit slightly smaller than the nail to avoid splitting and to keep nails straight.
1. Glue and nail 2 posts ( A ) together with 1 rail ( B ) and 1 rail ( C ) Fig.12 to make one side. Make second side.
2. In the same way join 2 sides together to form obelisk.

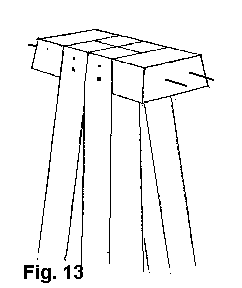
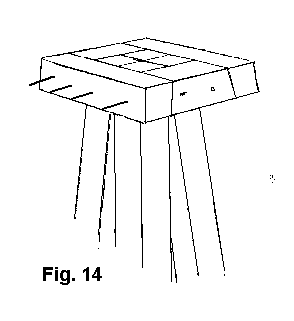
3. Glue and nail 2 pieces ( E ) to the top of obelisk Fig.
13 and then glue and nail 2 pieces ( D ) Fig. 14.
4. Glue ( G ) to ( H ) and glue and nail to top of obelisk.
5. Fix finial to top.
 |
 |
Fix into the ground with 4 9" galvanized
nails
predrilled through each post at aproximately 45 degrees
to the ground.
