|
|
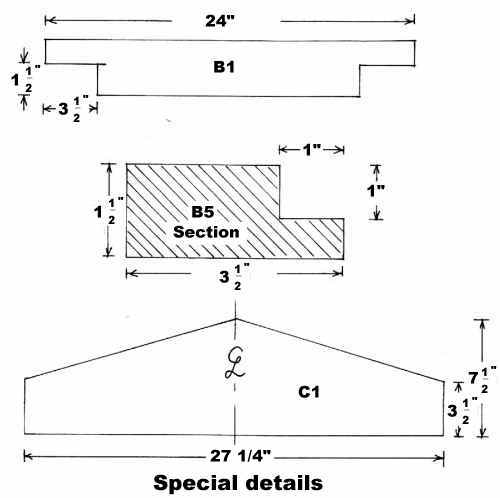
Use pressure-treated lumber
Sizes are actual - i.e. a 2 x 4 is 1 1/2" x 3 1/2"
|
|
|
|
|
|
|
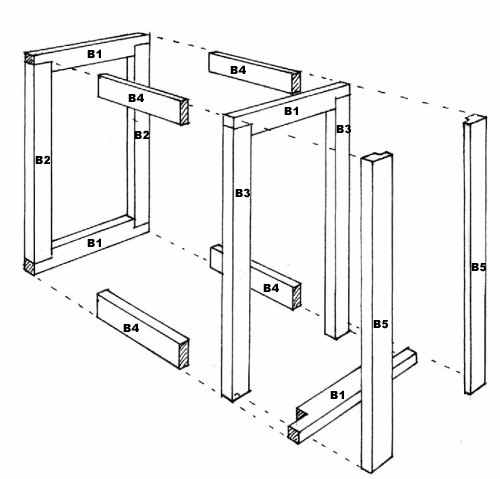
Details |
|
|
|
|
|
|
|
|
|
|
|
|
|
|
|
|
|
|
|
|
|
|
|
|
|
|
|
|
|
|
|
|
|
|
|
|
|
|
|
|
|
|
|
|
|
|
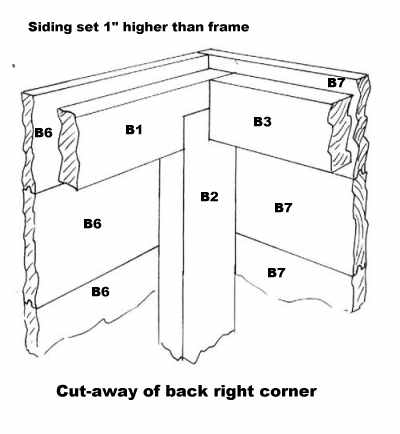
Siding |
|
|
|
|
|
|
|
Siding |
|
|
|
|
|
|
|
Siding |
|
|
|
|
|
|
|
|
|
|
|
|
|
|
|
|
|
|
|
|
|
|
|
|
|
|
|
|
|
|
|
|
|
|
|
|
|
|
|
|
|
|
|
|
|
|
|
|
|
|
|
|
|
|
|
|
|
|
|
|
|
|
|
|
|
|
|
|
|
|
|
|
|
|
|
|
|
|
|
|
|
|
|
|
|
|
|
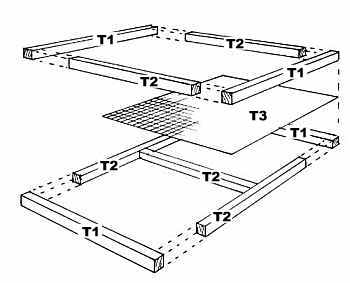
To cover Top |
|